

Doing your own product photography is fairly easy. All you need is a few basic items in place and a little knowledge about camera settings and an understanding of how to light your product, and you can achieve some amazing results for your own product photography.
Successful Product Photography
The key to successful Product Photography is to have your product evenly lit from all angles with lots of bright diffused light.
Why lots of bright diffused light?
Shutter Speeds
Brightly lit subjects mean that you can set the shutter speed to a faster setting. This is usually better for handheld photography, but having to sync with camera or studio flashes means that it is better to use a tripod to take product photographs. If you are using natural daylight (sun) or continuous lights, using a tripod will allow you to choose much slower shutter speeds and therefore a higher f-stop number and gain a greater Depth of Field (focus range). You will also eliminate any camera shake caused by hand holding the camera. And, your images will be sharper as a result.
Using a tripod will give you more control over the images you are taking, and if you have several products that are the same size, you do not need to move your camera, just swap out your products instead. This will help give your product photography a consistent look.
f- Stops
A brightly lit subject allows you to have the camera settings adjusted for a small aperture opening, which is a larger f-stop number, and will give a greater “Depth of Field”. The higher the f-stop number, the greater the distance from the front of your product to the back of your product that will be in sharp focus. Somewhere around f8 to f16 is very sharp on all camera lenses. In order to shoot around f8 aperture and have your entire product in focus, you will need plenty of light.

A Nikon D1 camera on a Plexiglas table showing reflection.
The brighter your subject is lit, the lower you can have your ISO number or camera sensor sensitivity, and this will give you maximum detail with the least digital noise. For Nikon cameras, the normal setting is 200 ISO and for Canon Cameras, this is 100 ISO.
Diffused Light
The importance of having a diffused (soft) light means your product is lit more evenly without having any harsh reflections. A bare bulb will give harsh light. But, if you place a piece of tissue paper or thin white cotton cloth in front of the bulb, this will diffuse the light and soften it considerably. Studio softboxes, and studio umbrellas are designed for this purpose.
White Balance or Light Temperature
All light has a particular temperature or colour, if you have all your lighting at say, 5000 K (Kelvin) which is equivalent to daylight at noon. You have the proper “white balance” for your photograph, and do not have to adjust this afterwards in post-processing. All camera flashes and studio flashes are adjusted to 5,000 K. All continuous light bulbs and continuous LED lighting come with a temperature rating from 3,000 K to 6,500 K. You have probably heard of this when selecting a “warm” LED or a “cool” LED lighting for your new kitchen downlights or a replacement bulb for your bedroom side table lamp. The warm (somewhat yellow) is around 3,500 K and the cool (somewhat blue) is around 6,500 K. For studio lighting, we need 5,000 K studio lighting, which is daylight at noon.
The Correct Exposure of a Photograph
A lot has been written about getting the correct exposure for your photograph. There are only three controls on your camera that effects the exposure of your photo. Two of them control the amount of light your sensor gets. How wide open the lens’ aperture is (f-stops), the wider aperture lets in more light. Or, how much time the sensor is exposed to the light (shutter speed). And, the third one controls how sensitive your sensor is to light (sensor ISO).
Basically, this has not changed since the invention of photography around 1826. Back then, the lens had no aperture so the lens was “wide open”, but wider lenses let more light in (f-stops). Original lenses did not have a shutter; the photographer simply removed the lens cap and manually timed the long exposure (shutter speed). The exposure time first started anywhere from days to hours to minutes as new chemistry was invented that was more and more sensitive to light (film ISO). Patrons had the back of their heads resting on a clamp so they would not move and cause blurring of their head during the long exposure for their portrait. But, the three exposure elements of f-stops, shutter speed, and sensor/film ISO are there.
Modern digital cameras allow you to change your ISO (sensor sensitivity) by amplifying the sensor’s signal, therefore requiring less light to make a correct exposure. In digital cameras, this starts to introduce noise in the signal or what used to be called “grain” in the days of film. This leaves the other two controls – shutter speed and f-stops. If you have a correct exposure and you decide to close down your lens’ aperture by one stop (1/2 as much light), you have to keep your shutter open twice as long (twice the amount of light) to still get the correct exposure. You have reduced the f-stop (smaller opening) and gained more Depth of Field (depth of focus), and now have to lengthen the exposure time by a factor of two. Thus the same amount of light is striking the camera’s sensor, and you still a correct exposure. The reverse is also true. If you open up your lens and let twice as much light in, you have to speed up your shutter and half the time of exposure.
You can go up and down either way with either control, but if you go up with one, you have to come down with the other. It is as simple as that!
If you need either control to go further than is practical in low light, you either have to increase the light by using a flash, or put the camera on a tripod and increase the exposure time.
Camera Exposure Settings
Shutter Speeds (equal to “1 stop” in amount of light . To the right= 1/2 the amount of light, to the left = twice the amount of light)
1, 1/2, 1/4, 1/8th, 1/15th, 1/30, 1/60, 1/125th, 1/250th, 1/500th, 1/1,000th
f-stops (equal to “1 stop” in amount of light. To the right= 1/2 the amount of light, to the left = twice the amount of light)
f-1.8, f-2, f-4, f-5.6, f-8, f-11, f-16, f-22, f-32
Sensor ISO (Light Sensitivity. To the right = twice as sensitive, to the left = half as sensitive)
50 iso, 100 iso, 200 iso, 400 iso, 800 iso, 1600 iso, 32,000 iso, 64,000 iso.
Many Correct Exposures
If you have a correct exposure of say, 1/60th of a second at f-8, then all the following combinations of shutter speeds and f-stops are also all correct. They are all the exact amount of light falling on the camera’s sensor.
| 1/4 | 1/8 | 1/15 | 1/30 | 1/60 | 1/125 | 1/250 | 1/500 |
|---|---|---|---|---|---|---|---|
| f-32 | f-22 | f-16 | f-11 | f-8 | f-5.6 | f-4 | f-2 |
Product Photography Set-Ups
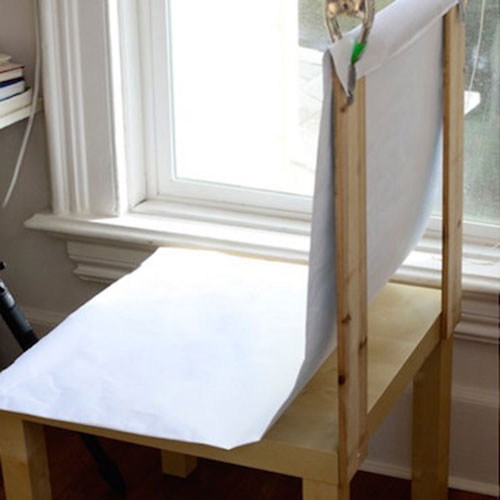
The Simple Set-up (no studio lights)
The simplest small product photography set-up can be a chair with a large sheet of tissue paper (for diffusion) and a large piece of white card-stock or a white sheet (for an infinity backdrop) with four clamps or tape, and a reflector or white card to balance the diffused light and give even lighting on both sides of your product. All beside a window on a sunny day. As well, you need a camera with a tripod or a phone camera with a phone holder/tripod.
Set up your chair so that the sunlight is falling on the seat. With the four clamps, fix the card-stock or white sheet so that it forms the background and the base that the product will sit on. This forms a no-seam bend (an infinity curve) at the back.
Position the reflector so that it reflects the sunlight back on the dark side of the product, balancing the light. Set the camera or phone camera on the tripod or mount, and focus on your product. Hold the sheet of tissue paper, or tape it to the window, so that the sunlight is now diffused on the product.
Take your photo.
Simple Set-up (with a Light Tent and Two Continuous Lights)
Light Tent (Cube)
For a better set-up, you will need a light tent and two light sources. This is a bit more controllable as you are not reliant on having a sunny day for your light.
A light tent will do your light diffusion for you, as well as help spread the light around the inside for the product. They come in a variety of sizes to fit almost every product, small to very large. A table will be big enough for everything to fit on top. You will also need two small tripods to mount your lights or flashes on. If you are using two flashes you will also need a simple flash meter and two small slave units to trigger your flashes if they are older flashes. All these items can be sourced on eBay for a small amount. The advantage of using flash is that it is white balanced (5,000 K) and this helps later in the post processing. If you are using two continuous light sources make sure they are also white balanced 5,000 K before you purchase them.
Your light tent may come with a white nylon sheet that has the four corners with Velcro loops and the Velcro fuzz on the inside of the tent so that you can place this white nylon sheet as an infinity curve backdrop for your product. If not, tape a thin white card-stock as the backdrop and form an infinity curve (no fold) of your own. Place the light tent in the middle of the table and mount your two light sources on either side facing inwards. Place your product inside the tent and set up your camera on the tripod.
If you have a zoom lens, come back away from the product a little and decide which type of shot suits your product – horizontal or vertical – so that you fill most of the viewfinder with the image of your product. Leave some space around the image of your product so that you are not too tight against the edges for a better look.

A large Light Tent (Cube).
Using Two Continuous Lights
Have the two continuous lights slightly above the product on either side of and a few inches away from the tent, and have them pointing towards the product. Turn on your lights.
With your camera on automatic (A) automatic or (P) programmable mode and the product in focus, take note of the settings – shutter speed and f-stops. Change your camera to (M) manual mode and repeat the same shutter speed and f-stop settings in manual mode.
This will allow you to adjust your camera manually to lighten or darken the image to get the best picture possible. Take a picture.
If your product is slightly dark, then either open up your lens by decreasing the f-stop by a stop (f-16 becomes f-11, or f-11 becomes f-8 and so on), or by slowing your shutter speed by one stop (1/250th second becomes 1/125th second, or 1/125th second becomes 1/60th second and so on).
If your product is slightly too light, then make the adjustment the other way – increasing the f-stop by one stop, or increase the shutter speed by one stop.
Take another picture and adjust if necessary.
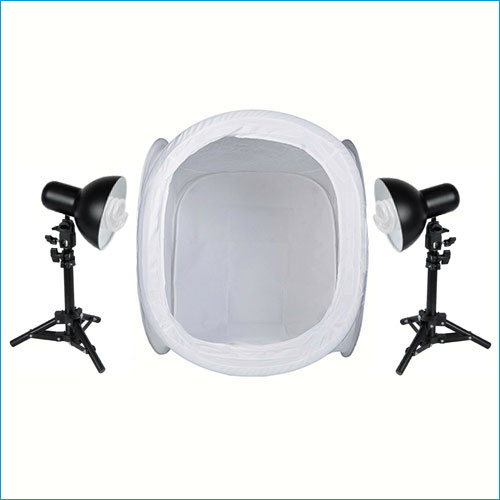
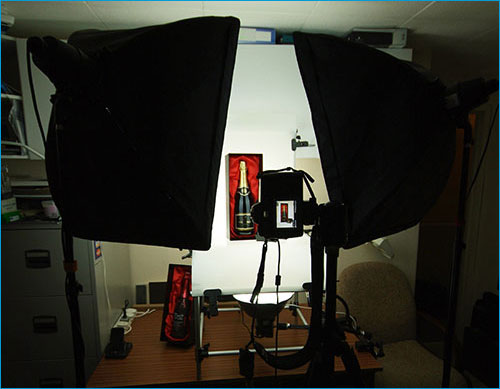
A medium Light Tent with 2 continuous lights (non-flash) placed either side.
Simple Set-up (with a Light Tent and Two Flashes)
Using Two Flashes
Older Flashes
I have always used the excellent Vivitar 283 Automatic Thyristor Flash. They are the most popular flash in the world. Vivitar started manufacturing them in the 1970s and sold three million on them in the first three years. They are still being manufactured (now in Korea) 50 years later. So there are lots available and they can be purchased inexpensively on eBay for about £10.00.
A small note: The original ones manufactured in the 70s have a high sync voltage of around 250 volts which will zap your modern digital camera if attached to it. The later ones (HV series) were manufactured with about five volts trigger voltage. This is why I suggest the optical flash slave trigger (next) as there is no direct connection to your camera.
You will need a couple of optical flash slave triggers and these can also be purchased on eBay for about £5.00. Put your flashguns on the slave trigger; the flash’s shoe fits into the top of the slave trigger and the slave trigger has a 1/4 screw thread on the bottom which will screw into the small tripod or tabletop stand (eBay – £10.00). Set your flashes to medium power (red on the Vivitar 283). Now, place the flashes on either side of the tent at least eight inches away and slightly higher than the product in the tent and both pointing slightly down towards your product.
Again, you will need a Flash Meter to take an accurate reading of the light falling on your product. Set the flash meter to 1/60th of a second, at the same ISO setting on your camera (100 or 200 ISO), and place your flash meter in the tent in front of your product facing towards your camera.
Set your camera’s little onboard flash; either pop it open or use your menu to set your camera to always flash. The camera’s onboard flash will trigger the two external flash slaves, which in turn will trigger the two product flashes. This will happen within 1/25,000th of a second and for our purposes be instantaneous. Take a reading off the flash meter and note the f-stop of the reading, and adjust your camera’s f-stop setting accordingly.
Now take a properly exposed picture.
If you need more light then turn up both your two flashes to 3/4 power (blue setting on the Vivitar 283), and take another flash meter reading, and adjust your camera’s f-stop setting accordingly. If your light is too concentrated in one area, then move both your flashes further away from your light tent or place a tissue over the flash tube to further diffuse the light coming from your flashguns.
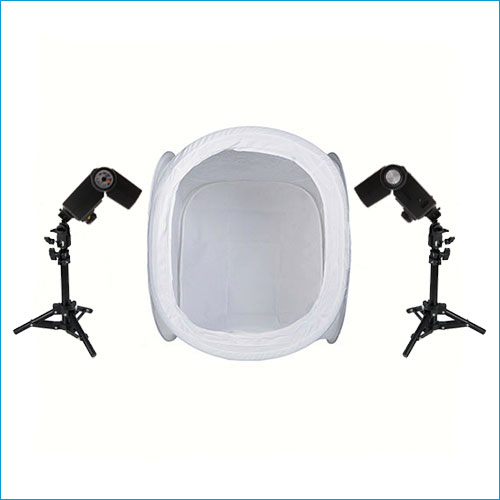
Product Photography with a Light Tent and 2 – Vivitar 283 Flashes.
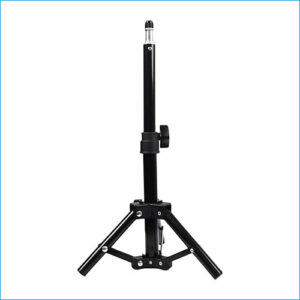
Table top stand
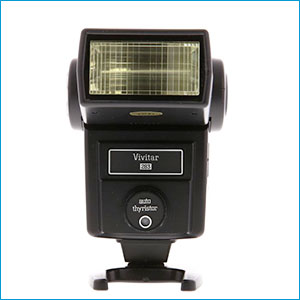
Vivitar 283 Auto Thyristor Flash Gun
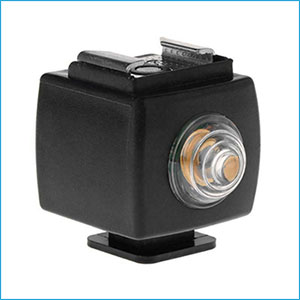
Optical Flash Slave Trigger
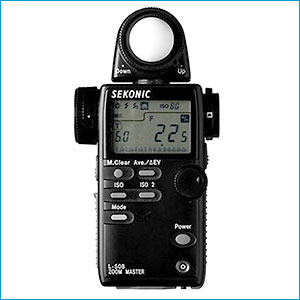
Light / Flash Meter
Modern Speedlight (Flashes)
If you are using modern flashes (speedlights), they can be set up to work with the one on the camera as the master flash and the two either side to be slaved all with different flash outputs. Check your owner’s manual to see how to do this as they are all different and an entire guide could be written on this topic. I like to work a little simpler. With your two flashes either side of your tent, turn them to slave mode so that they will trigger when another flash goes off. Turn on your flashes to half power. If your camera has a little onboard flash, pop it open and set your camera to always flash.
You will need a flash meter to take a reading of the light from the flashes reaching the product. You adjust the ISO setting and the shutter speed setting on the flash meter, and when you trigger your flashes, it will take a reading and tell you what f-stop the light level reached. I would suggest setting your flash meter to 1/60th of a second, at the same ISO setting on your camera (100 or 200 ISO).
Place the flash meter in the tent in front of the product, facing the camera. With your camera in manual setting, and the camera shutter speed at 1/60th second and the aperture at around f-8, and the product in focus. Take a picture.
The onboard camera flash should trigger the internal flashes triggers, which in turn will trigger the two product flashes. This will happen within 1/25,000th of a second and for our purposes be instantaneous. Take a reading off the flash meter and note the f-stop of the reading, and adjust your camera’s f-stop setting accordingly.
Now take a properly exposed picture.
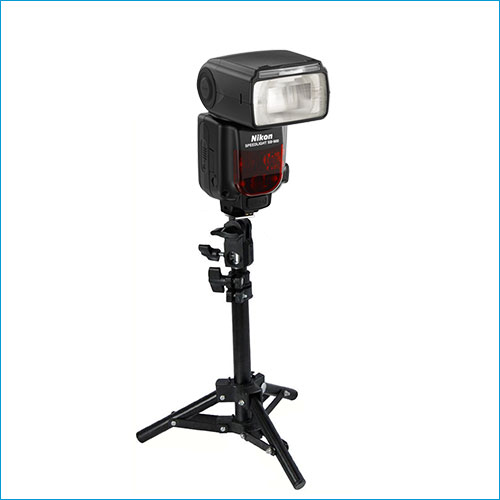
A modern Speedlight with a stand.
Tabletop Studio Set-up (with Three Studio Flashes)
The Ultimate Tabletop Studio
I have a set-up that I put together that makes product photography a snap.
Two pull down blinds for an infinity backdrop, one in black and one in white. Three Bowens Prolite 60s (250 watts) Flash Head Studio Lights, for way more diffused light than I will ever need. They are mounted on Manfrotto Magic Arms with Manfrotto Super Clamps for total flexibility, and finished with three studio softboxes. The larger one on top for the background and two either side of the product, set at approximately 45 degrees.
On my camera, I have a wireless flash trigger and a receiver on one of the Bowens studio lights to trigger the flash, and the other two studio lights set to slave. I also have a wireless remote control for the camera so that there is absolutely no movement of the camera while it is on the tripod.
This set-up lets me concentrate on how the product will look in the finished shot.
Product images turn out perfectly exposed in diffused light, fully in focus (pin sharp) at the touch of a button.
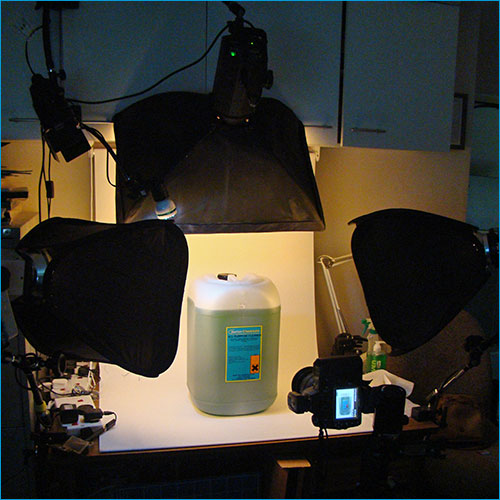
Using a roller blind as an infinity backdrop, with three Bowens studio lights with softboxes mounted on three Manfrotto Magic Arms gives great flexibility and makes product photography a snap!
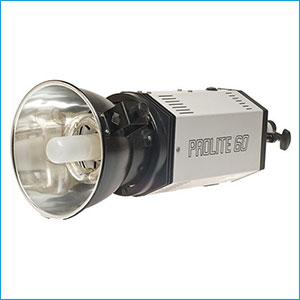
Bowens Prolite 60 Studio Flash
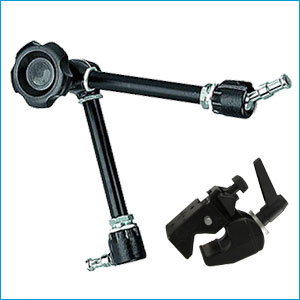
Manfrotto Magic Arm and Manfrotto Super Clamp
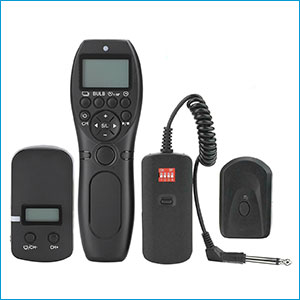
Camera Radio Control, and Flash Receiver and Trigger
Different Set-Ups
You can have as many different set-ups as you can think of. It can be fun to experiment with different combinations of lights. This is where to find out which ones work for you and which ones do not. There are no fixed rules other than producing an image that shows your product with as much detail as possible. The product image can be further enhanced to make it as attractive as possible.
The product on a Plexiglas table lit from in front with two continuous lights in softboxes at 45 degrees to the product, as well as from behind with continuous lights.

A side view of the Plexiglas light table with two continuous lights in front and three continuous lights below and behind the product.
The finished post-processed image with a white background.

The same image with a different background added in post-processing.
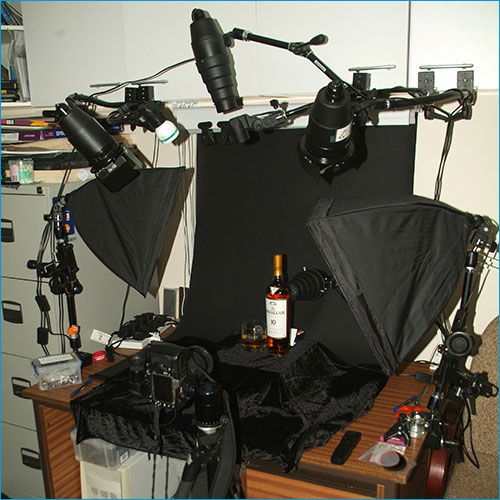
A more complex tabletop set-up (a little bit over the top).
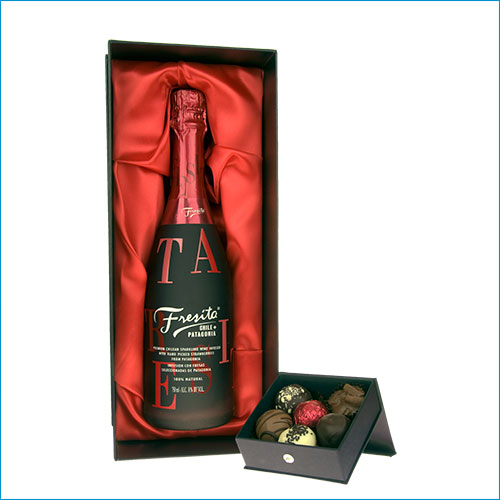
The finished Product Photograph. It was worth it (delicious).
Full Studio Set-up (with Multiple Studio Flashes)
Studio Set-Up
If your product size warrants it, you may have to go to a full studio set-up. This would include a full-size backdrop on a backdrop stand, and two or more powerful studio flash heads with full-size softboxes. The principle of lighting your product is exactly the same as it is in the tabletop set-up – just in a bigger size.
For this set-up, a flash meter is a must as you will need to take a reading once you have finishing placing your lights. A small change in the location and distance from the light will effect the amount of light falling on your product.
Keep in mind that you will want to have even, diffused light around your product as apposed to portrait photography which it is common to have a main light and a fill light with a 2:1 or 3:1 ratio.
I have also found that using the largest size of softbox (within reason) results in a softer, more diffused light which is perfect for product photography. When it comes to softboxes – go big if you can.
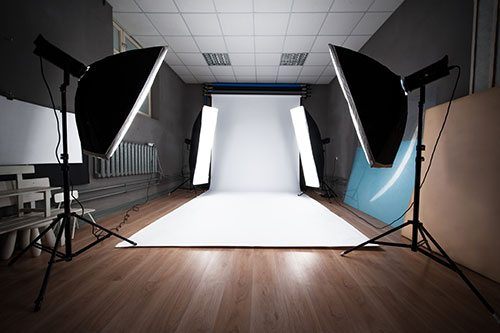
Full Studio Set-up with two Bowens (1000 watt) Flash Heads and 2 Bowens 120 (750 watt) Flash Heads with rectangular and two narrow strip-light softboxes.
On-Location Set-up (with Two Studio Flashes)
On-Location
If your product is so large or heavy that it has to be photographed on location, then instead of transporting the whole studio, it is easier to travel a bit lighter.
This is where studio umbrella reflectors are very useful. They still give quite a diffused light as the inside has a white material, and are easy to set up. They also fold down to practically nothing. Again, the larger the better for a softer light.
Two 750 watt studio light will provide plenty of lighting power. If placed at 45 degrees on either side and slightly higher, but pointing towards your product, you will get a nice even, diffused light.
Again, having an even distance from your lights to your product is essential. Once you have placed and adjusted your lights, a flash meter is a must to take a reading of the exact exposure. Because of the depth of the product, I make sure I am shooting at least f11 or f16 to get the whole product in focus. Also, placing the product on an angle allows you to see two sides of the product which gives a better idea of the size of the product.
On-location shooting can sometimes provide additional unforeseen challenges.
We quickly learned that a hand fork truck placing a full pallet on a spotlessly white backdrop resulted in a very dirty backdrop even though we swept the entire area beforehand. We now have the backdrop going down to a tarp which is on the floor, and the floor that is in the photograph can easily be removed in the post-processing of the image.
Also, a very long extension cord comes in handy as there could be quite a distance to any electrical outlet. If there is no electrical outlet at all, and without having to go to the additional expense of purchasing a separate portable battery powered studio lighting kit, then it is a good idea to have either a small generator handy, or a 240 volt AC inverter used with your a car battery or a separate car battery, providing mains power. With the inverter and battery, we have found that the 750 watt flash heads do not use up that much power, as the duration of the flash is very short. Unlike trying to run a 750 watt microwave which is continuous, and would not take long to drain a battery.
If you have any questions, please contact us. To enquire about our commercial product photography services, please visit Toucan Photo services.
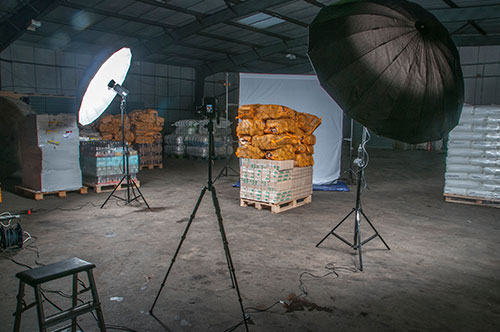
On-location product photography with two 72″ umbrellas and two 750 watt Bowens flash heads
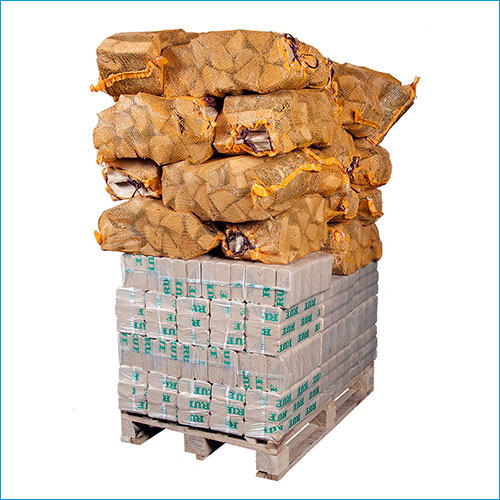
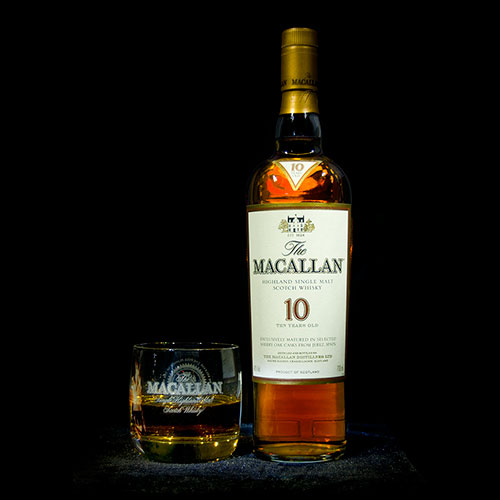
The Finished Product Photograph