
Adding Categories and Products to your WooCommerce shop can seem overwhelming at first.
But after adding a few categories and several products, you will get the hang of it quite easily.
The full searchable Documentation, and Reference Materials, and Tutorials for WooCommerce can be found here.
Adding Categories and Products to a WooCommerce Shop
Adding Categories
Your WooCommerce Shop Page displays all your Categories. You need a product in the category in order for the category to show up. In other words, the shop will not display any category that does not have a product in it.
You will need an image that represents the new category saved as a .jpg 72 dpi and 60% (high) quality and 300 pixels x 300 pixels in size. Save the image to a folder in your computer where you know how to locate it.
Go to the WordPress Control Panel – Products – Categories.
On the left put in the name of the new category. e.g., “Dog Holidays“. Add the slug, which is usually just the name with no capital letters and no spaces – use hyphens for spaces “-” becomes “dog-holidays“.
Parent Category – none. Choose a parent category to add this category as a sub-category.
Example Description (for SEO)
Be descriptive and add a few key positive words, such as
“100% dog-friendly eco vacations for your dog. Where your dog will be pampered like never before. Dog activities and entertainment venues are set up for your special friend. Group walks or private walks with keep them healthy and happy.”
Display type – Standard. Choose from Products, Sub Categories, or Both. It is usually left as “standard”
Uploading your Image
Click on “Upload your Image” which will open the Media Library, click on upload files (top left) – Select files (middle) – and choose the location for your saved image. Click on the file and then – open (at the bottom) and the file will upload to your website. It will be highlighted and you need to click on the “Alt Text” and enter the name of the Category (for SEO) “Dog Holidays” and click on the bottom “Use image”, and the image will appear in your category as a thumbnail.
Click on “Add a new category” to save the category.

After you have saved it should appear on the list of categories.
Go back into the category (Edit it), and you will then see all the settings – including Yoast SEO. Complete the SEO just like you would for a product. You can see how to do this in the YOAST SEO (Search Engine Optimisation) section way below. This will greatly improve your SEO and Google will rank your shop higher every time you complete this for each category.
Inserting Simple Products
Get the largest image of the product that you can get – try for 1000 x 1000 pixes (eBay and Amazon size recommendation). Crop and Save the image as a jpg, 72 DPI reduced to 60% quality – file size (see Image Optimisation for Websites) in your computer in a known location.
Log into your WP control Panel – Products – Add New – Insert the product name.
Example
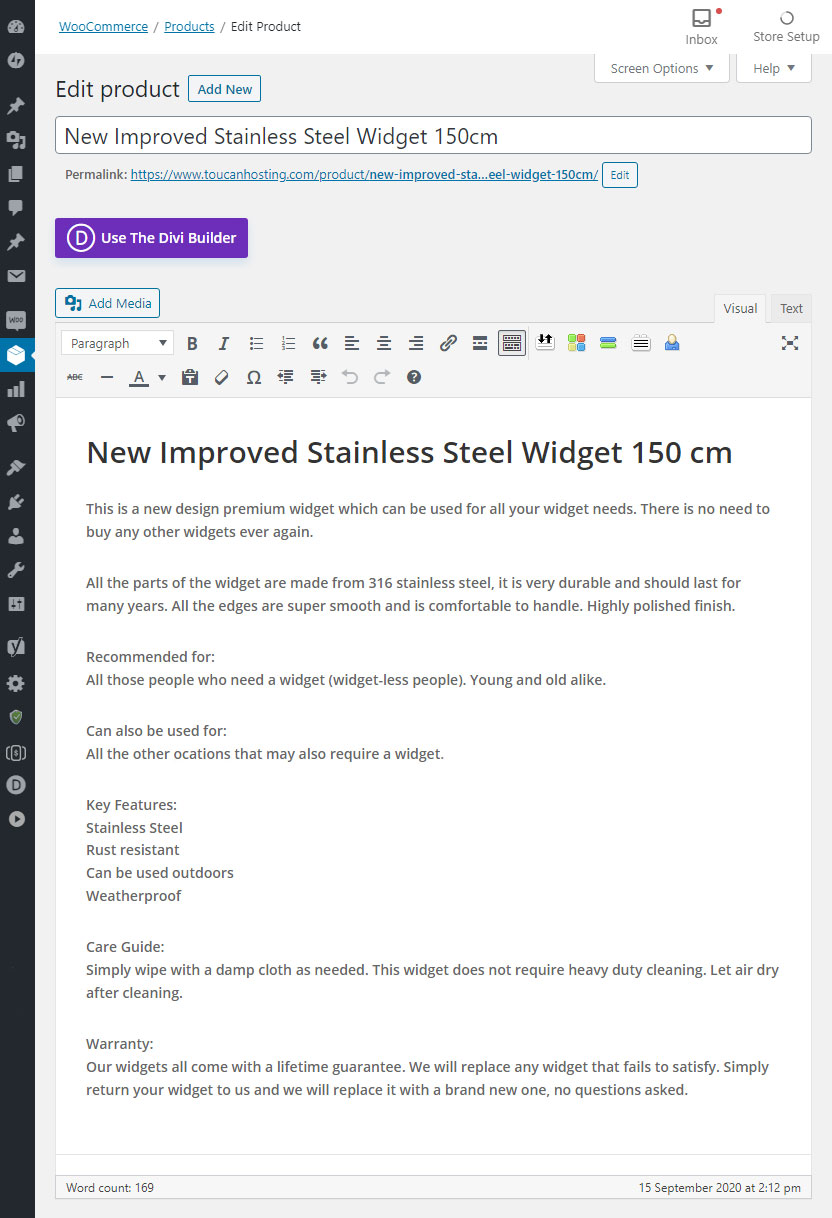
New Improved Stainless Steel Widget 150cm
Product Description
Come up with the description text yourself or if it is available, copy the description text from the manufacturer.
Repeat the product title, copy and paste it into the Description Area.
Highlight it and assign it a “Header 1” formatting – (under Paragraph).
Add the rest of the description (as a Paragraph formatting). Also pay attention to the paragraph spacing after you paste the description.
————– Example
New Improved Stainless Steel Widget 150 cm
This is a new design premium widget which can be used for all your widget needs. There is no need to buy any other widgets ever again.
All the parts of the widget are made from 316 stainless steel, it is very durable and should last for many years. All the edges are super smooth and is comfortable to handle. Highly polished finish.
Recommended for:
All those people who need a widget (widget-less people). Young and old alike.
Can also be used for:
All the other occasions that may also require a widget.
Key Features:
Stainless Steel
Rust resistant
Can be used outdoors
Weatherproof
Care Guide:
Simply wipe with a damp cloth as needed. This widget does not require heavy duty cleaning. Let air dry after cleaning.
Warranty:
Our widgets all come with a lifetime guarantee. We will replace any widget that fails to satisfy. Simply return your widget to us and we will replace it with a brand new one, no questions asked.
————– End of Example
Highlight and Bold (Control – B) the sub-headers as I have done above.
Product Category
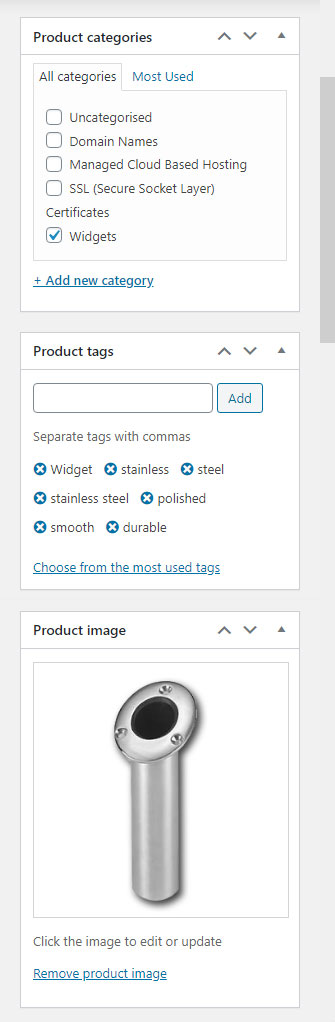
On the right-hand column – assign the product to a Product Category (example, Widgets).
Product Tags
Add your product Tags – (lower case and separated by commas and a space) I took these from the description text –
Example:
“widget, stainless, steel, stainless steel, polished, smooth, durable”
I copied the above and pasted them in as a group and clicked “Add”.
Set Product Image
Click and it will take you to the Media Library – click on “upload files” – click “select files” –
Go to where you keep all your images for your shop in your computer – click on your image file and click “open”.
WordPress will upload your image to your website. Your image will be highlighted. Put in the title of the product for the “Alt Text” – Stainless Steel Widget – this helps with SEO – click on – Go to the bottom right of your Media Library and select the options – Positioning (usually centre), Link (if any), and size to display (Usually full size). Click on Set Product Image (bottom right).
WordPress will take you back to your WooCommerce product insertion page, and your product image will now appear in the Product Image box..
Product Gallery
If you have other images you can use, then add them to the Product Gallery at the bottom right using the same method as the Product Image.
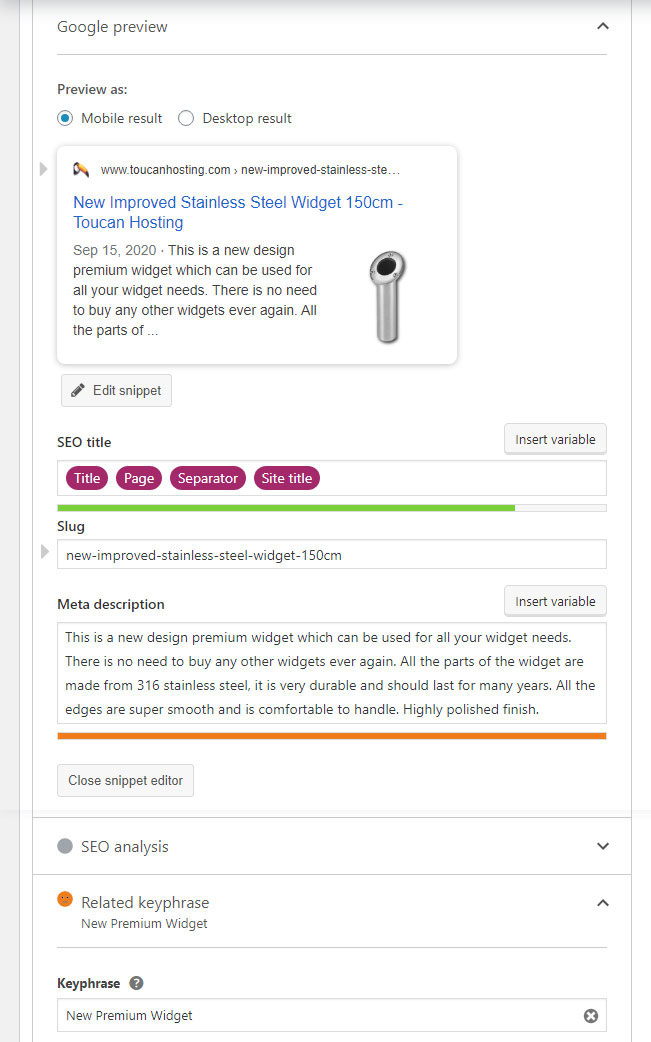
YOAST SEO (Search Engine Optimisation)
If you have the Yoast (SEO) plugin installed (highly recommended), you will see the next section below the Product Description. It is the Yoast SEO. You can see the Google View either in the Mobile result or the Desktop result.
Clicking on the text in either view opens up the Meta Description box – The Snippet Editor. Copy and paste the first two sentences from the product description into this box. Edit it, if required.
“This is a new design premium widget which can be used for all your widget needs. There is no need to buy any other widgets ever again. All the parts of the widget are made from 316 stainless steel, it is very durable and should last for many years. All the edges are super smooth and is comfortable to handle. Highly polished finish.“
This is the image and text that will show up in the search results from Google.
Next, click on the down arrow and enter the text for your Added Related Key phrase in this case it would be something like “New Premium Widget“.
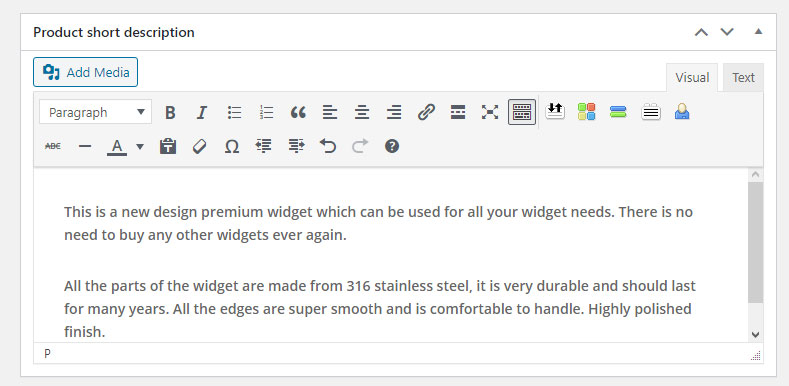
The next dialogue box below the Yoast (SEO) will be the Product Short Description dialogue box.
Product Short Description
Go to your Product Description box at the top of this page and copy (Control”C”) the text from the first two sentences of the Product Description (into your “clipboard”) and Paste it (Control “V”) in the “Product Short Description” dialogue box.
This text will show up besides your Product Image at the top of your finished products page.
Do not forget to click the “Publish” or “Update” button to save your product to your website’s data base.
Inserting Variable Products
Adding attributes and variables to a product that
will have a drop-down options in the product page.
In the Product Data Section – Select Variable Product instead of Simple Product.
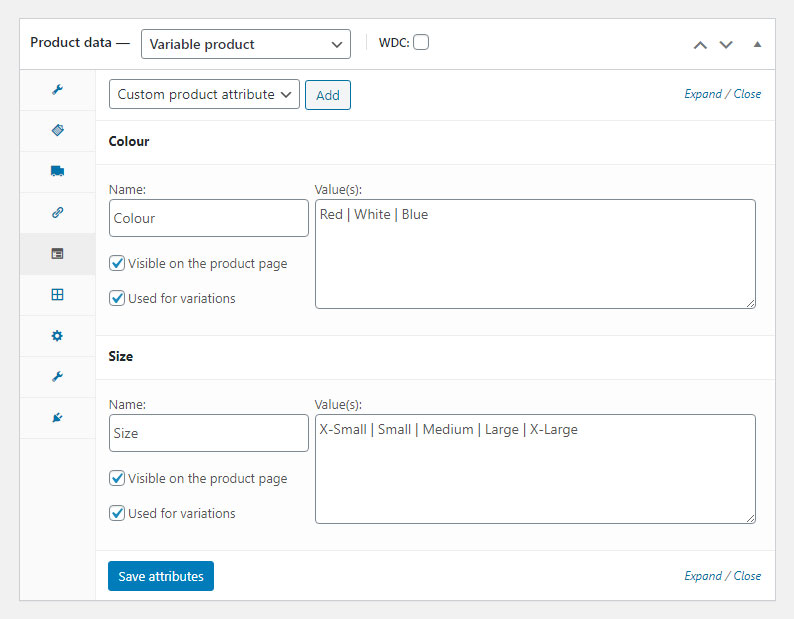
Click on Attributes on the left. (5th one down)
Next to Custom product attribute, click on the “Add” button. Type in an attribute like “Colour“, and add the colours in the box to the right separated by a space and a glyph (a little vertical line, or vertical slash) and another space, like the following –
Red | White | Blue
Tick on “Used for variations“
Click on “Save attributes“
If the product has a second attribute – like different sizes – go back to the “Custom product attribute – Add – button, and click it. A second attribute section will appear. Again, type in the name of the attribute like – “Size”, and again add the different sizes in the box to the right separated by a space and a glyph and another space, like the following –
X-Small | Small | Medium | Large | X-Large
Again, Tick on “Used for variations“
Click on “Save attributes“
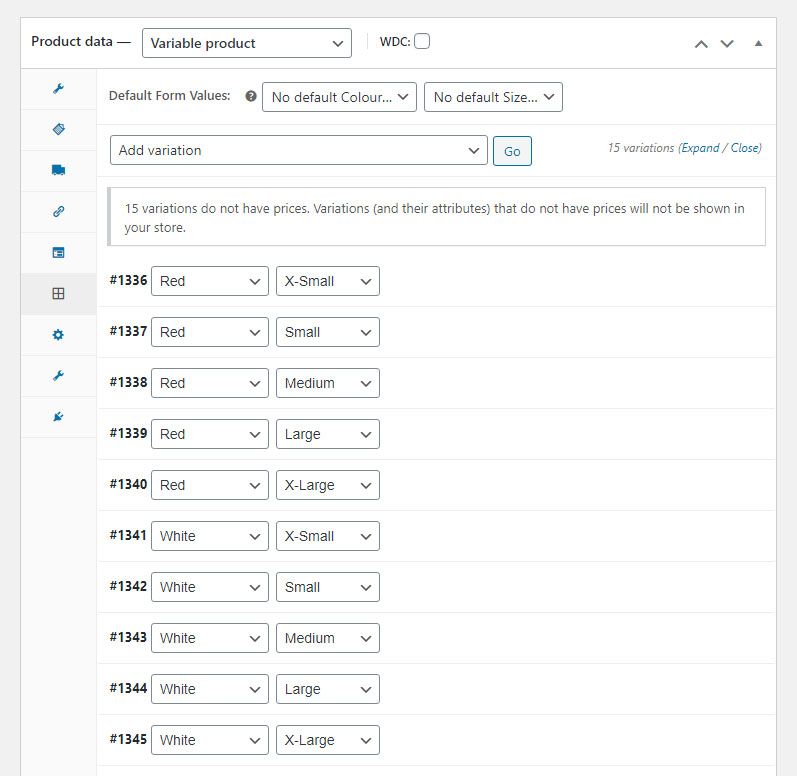
On the left click on “Variations“. In the box “Add a variation” click on it and select “Create variations from all attributes” Then click “Go“. A popup will appear –
“Are you sure you want to link all variations? This will create a new variation for each and every possible combination of variation attributes (max 50 per run).”
Click “OK“
Another popup will appear –
“15 variations added”
Click “OK” (as the spinner will sometimes just keep on spinning if you do not click “OK” depending on the number of combinations of variations)
And you will have all the variations appear – with the notice –
“15 variations do not have prices. Variations (and their attributes) that do not have prices will not be shown in your store.”
We now have to put in all the different prices for each variation. Click on the white space to the right of the first variation row (in this case – Red – X Small) and all the options will appear. Put in the price for a x-small red widget – in the “Variation price” box – again only insert the amount – do not include the £ Pound Sign.
Click on the same white space to close this options section and then proceed to click on the white space besides the second variation row. Put in the price and then close the options section and repeat this for all the variations.
When you are finished – Click on “Save changes” at the bottom of the section.
Click on “Publish” or “Update” to update the product on the right-hand column near the top of the product page to insert or update your new product into the website’s database.
All done!
If you have any questions, please feel free to contact us.